REVIEW · GHENT
Private Historical Tour: The Best of Ghent
Book on Viator →Operated by Gent Free Walking Tour · Bookable on Viator
Ghent has a talent for turning stones into stories. This private historical walk threads the city’s medieval power—from trade on the canals to the people’s tower at the end. You’ll cover the must-see sites with context, not just checklists, and your group stays together the whole time.
Two things I like a lot: first, the tour’s pace and format feel made for learning without stress. Second, the stops focus on why Ghent looks the way it does—trade, rule, rebellion, and local myths. A possible drawback: you’ll mostly view major sights from the outside, so if you want inside access (churches, towers), you may need separate tickets or a pass.
The Best of Ghent Private Historical Tour: Key Highlights at a Glance
- Private, only your group: no waiting for other strangers, and it’s easier to ask follow-up questions.
- Local guide storytelling: you get the city’s meaning, not just dates and names.
- Two-hour “big hits” route: you’ll hit the Bridge, Graslei/Korenlei, Gravensteen, Town Hall, St. Bavo’s, and the Belfry.
- Legend-rich stops: prisons, patron saints, and the kind of local legends you won’t find in a guidebook.
- Smart city layout for photos: the route naturally works for skyline views and landmark sightlines.
- Hotel pick up/drop off: helpful if you want to arrive without juggling transit and timing.
In This Review
- Getting Your Bearings: Why This Route Works in Two Hours
- Price and What You’re Actually Paying For
- Meet at Sint-Michielsplein, Then Start Where Ghent Looks Like a Postcard
- Stop 1: St Michael’s Bridge and the Skyline’s Three Towers
- Stop 2: Graslei and Korenlei, Where the Port Beating Heart Still Shows
- The Design Museum Story: Ghent’s Stubborn, Rebel Mindset
- Stop 3: Het Groot Vleeshuis and the Covered Butchers’ Hall
- Stop 4: Gravensteen, the Castle That Doesn’t Hide
- Stop 5: St. Veerleplein, Square of Death and Square of Life
- Stop 6: Huis van Alijn, the Hospital and the Only Remaining God House
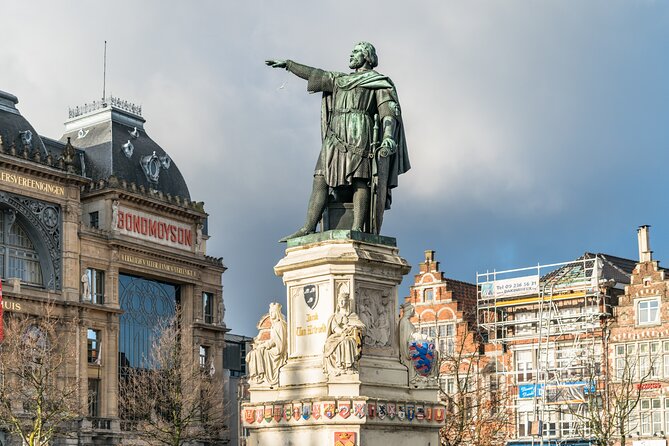
- Stop 7: Vrijdagmarkt and the Statue in the Middle
- Stop 8: Werregarenstraat and Why Street Art Here Is Different
- Stop 9: Ghent Town Hall (Stadhuis), the Building That Looks Confused
- Stop 10: St. Bavo’s Cathedral and the Van Eyck Anchor
- Stop 11: The Belfort (Belfry) and the People’s Tower Story
- Stop 12: Esglesia de Sant Nicolau (Early 12th Century) and the Merchant’s Patron
- What Makes the Tour Feel Worth It: Guide Style and Small Luxuries
- Who Should Book This Private Ghent Highlights Tour
- Final Decision: Book It or Skip It?
- FAQ
- How long is the private historical tour of Ghent?
- Where does the tour start and end?
- Is this tour private or shared?
- What language is the tour offered in?
- What’s included in the price?
- Are entrance tickets included for the stops?
- Is food included?
- Can I bring a service animal, and is the area reachable by transit?
- Is free cancellation available?
Getting Your Bearings: Why This Route Works in Two Hours
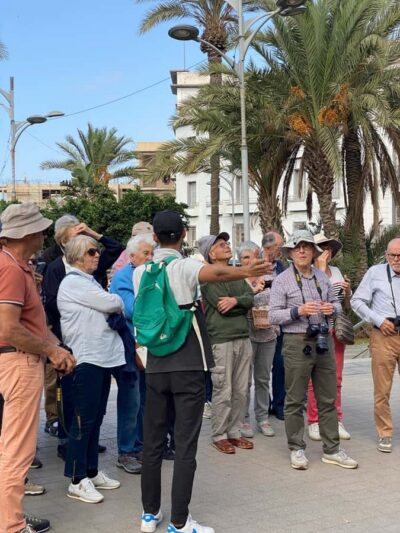
If it’s your first time in Ghent, you need two things fast: orientation and an understanding of what drove the city. This tour gives you both in about two hours, walking between the most recognizable spots and the “why” behind them.
I like that the route is built around major geographic beats: the riverfront trading zone, the castle area in the city center, and the final stretch toward the Belfry. That means you’re not just hopping from one photo spot to another—you’re learning the logic of the city.
Your guide also brings humor into the mix. Some departures include playful moments like a knowledge check and fun challenges, which can make the tour feel lighter while still informative.
Price and What You’re Actually Paying For
At $105.82 per person, this is not a budget activity. You’re paying for private time with a local professional guide, plus hotel pick up and drop off, and a mobile ticket. In plain terms: you’re buying convenience and focus.
Here’s the part to think about. Several stops are marked as admission ticket free, which usually means you’re seeing sights and learning about them rather than paying to go inside at every stop. One review note called out that a historical pass could help if you want entrance access beyond the exterior views. So if your must-do list includes interior visits, add that cost to your planning.
If you’re traveling as a group, look for the group discount angle too. A private tour can feel much more fair when split among more people—and you’ll still get the private-guide advantage.
Meet at Sint-Michielsplein, Then Start Where Ghent Looks Like a Postcard
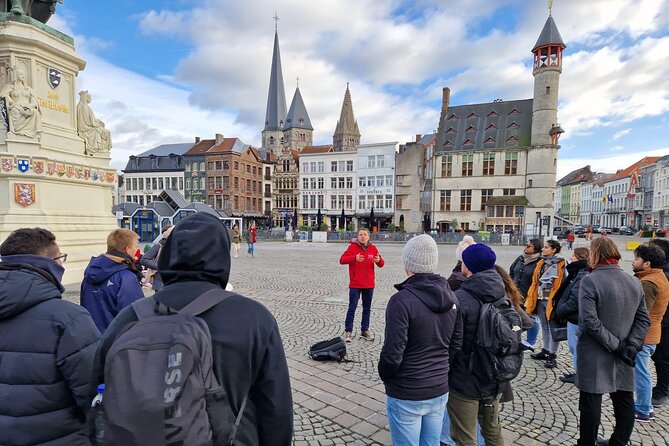
The tour starts at Hostel Uppelink, Sint-Michielsplein 21, 9000 Gent. That puts you near the river and in the right mindset from minute one: medieval Ghent was a trading city, and the cityscape reflects it.
The tour ends in front of the Belfry (Belfort van Gent) on Sint-Baafsplein, 9000 Gent. This matters more than it sounds. By finishing where the “people’s power” story culminates, you leave with a clearer mental picture of how Ghent’s independence was expressed through its buildings.
Because there’s hotel pick up/drop off included, you don’t have to sweat the first 20 minutes. Just show up, keep your walking shoes ready, and let the guide do the heavy lifting.
Stop 1: St Michael’s Bridge and the Skyline’s Three Towers
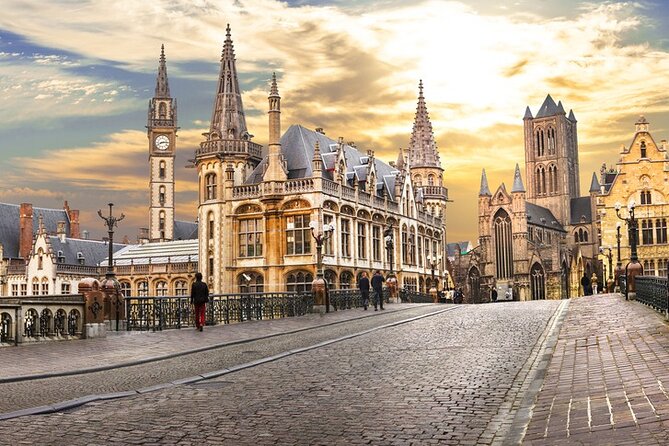
You begin at St Michael’s Bridge, which is a smart starting point because it frames the city. Your guide sets the stage with Ghent’s medieval role as a trading hub, and then points you to the city’s skyline elements.
A key moment here is the visibility of the three towers of Ghent. If you’re the type who likes photos that actually match what you’re hearing, this stop pays off. You can look across, spot the skyline markers, and connect them to the story rather than hunting for them later.
Time on the stop is short (around 15 minutes), so I’d treat it like a warm-up. You’ll get enough context to enjoy the next areas more.
Stop 2: Graslei and Korenlei, Where the Port Beating Heart Still Shows
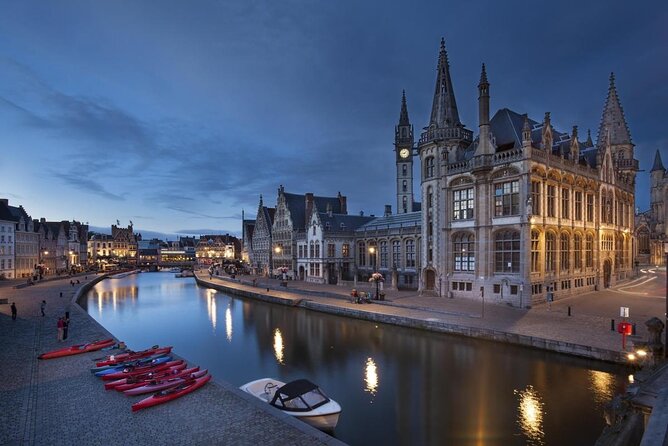
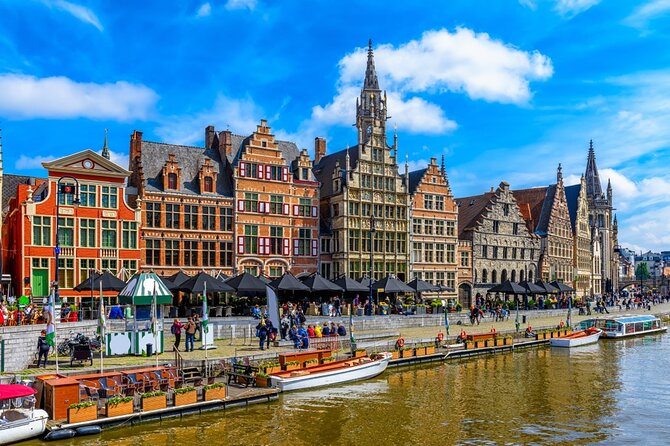
From the bridge you move to Graslei and Korenlei, described as the beating heart of the historical city center. This is where Ghent’s canal life makes sense.
Your guide points out which buildings were involved in trading activity when this area functioned as the city’s port. That detail changes how you look at the facades. Instead of thinking, pretty old buildings, you start seeing the “work of the city” written into stone.
This is also a stop that tends to suit quick learners and slow walkers alike. The area is central, the distances are manageable, and your guide can keep the story moving without you falling behind.
The Design Museum Story: Ghent’s Stubborn, Rebel Mindset
There’s a short stop tied to the Design Museum and the idea of the Gentenaars’ stubborn, rebellious mindset. Even though you may not get a deep museum visit here, the tour uses design as a window into local character.
I like this approach because it’s a reminder that history isn’t only wars and rulers. Cities develop an attitude, and that attitude shows up later in culture and design.
If you enjoy local personality as much as buildings, this is the stop that can feel the most “Ghent.” It’s also brief, so listen closely—you’ll want the explanation, not just the location.
Stop 3: Het Groot Vleeshuis and the Covered Butchers’ Hall
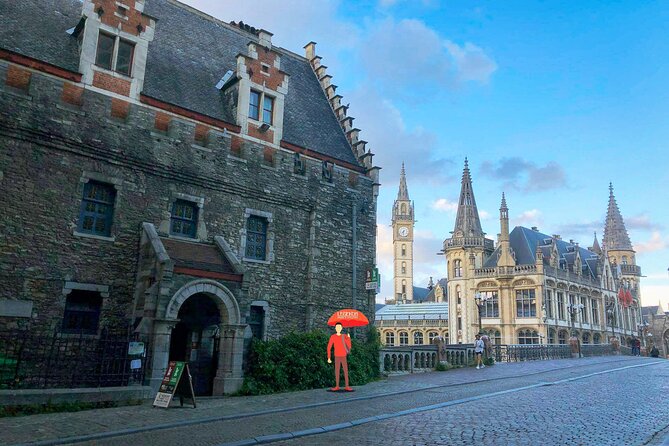
Next is Het Groot Vleeshuis, where you get a view across the water of the medieval covered Great Butchers’ Hall. This one has a darker edge.
Your guide shares facts about why this building is “majestic” and also why it carries a less cheerful side. Food industries and guild economies can be heavy topics, but the tour keeps it understandable, connecting what was done here to the city’s economy and power.
This stop is short (about 10 minutes), so it works best if you’re okay with “tell me the punchline” style history. You won’t leave with a full lecture, but you’ll leave with a better sense of what kind of city Ghent was feeding and funding.
Stop 4: Gravensteen, the Castle That Doesn’t Hide
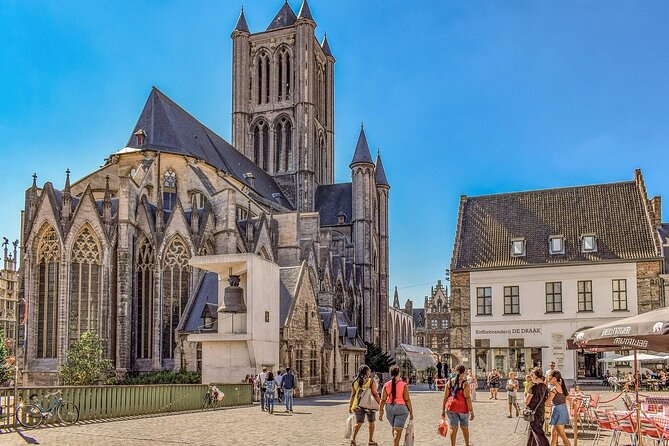
Most castles sit outside the city walls. Gravensteen is different. It’s the medieval Castle of the Counts, and it’s located right in the middle of Ghent—still very well preserved.
Your guide explains its impressive past and how the castle fit into daily urban life. This is one of the stops where I always find myself looking up more than ahead. The structure reads like a physical argument: this is where power lived.
It’s also a helpful reset point in the route. After trade and guild life, you shift to rule and enforcement—then the tour moves into the symbolism of the squares right after.
Stop 5: St. Veerleplein, Square of Death and Square of Life
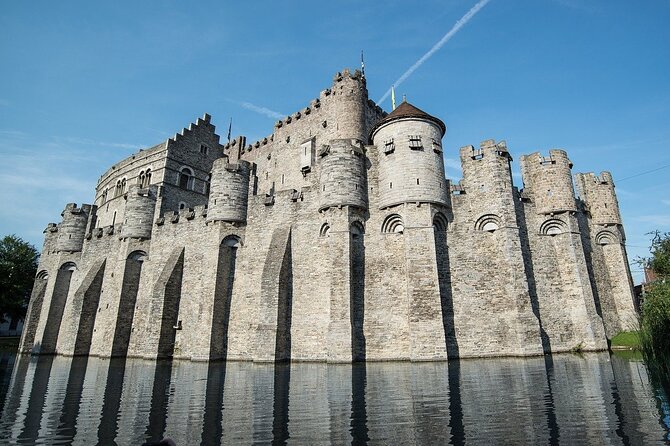
At St. Veerleplein, the story gets dramatic. The square is known as both the square of death and the square of life, and your guide explains why.
I like places with contradictory names. It forces you to think beyond one narrative. In this case, it’s a lesson in how public spaces carried multiple meanings—punishment and livelihood, fear and community—often in the same streets.
This stop lasts around 10 minutes, which is enough to grasp the theme without turning the walk into a history seminar.
Stop 6: Huis van Alijn, the Hospital and the Only Remaining God House
Huis van Alijn is where you shift from power to care. This building used to be a hospital, and it’s described as the only remaining god house in Ghent.
Your guide walks you through the unfortunate story of how it became a hospital. That phrase matters: you’re not just touring architecture, you’re learning how institutions formed under social pressure.
This stop is short (around 10 minutes), but it adds necessary variety. A tour that only focuses on politics can start to feel like a loop. This one breaks that rhythm.
Stop 7: Vrijdagmarkt and the Statue in the Middle
At Vrijdagmarkt, you’re in one of the squares where Ghent’s history played out. Your guide connects the square to major moments and explains the story behind the man’s statue in the middle.
A square stop can feel filler if the guide doesn’t have a strong narrative. Here, the goal is to show you how public monuments act like condensed memory. You look at the statue differently after you understand what it’s for.
Like most stops here, it’s about 10 minutes—enough to plant the idea, not enough to drown you in details.
Stop 8: Werregarenstraat and Why Street Art Here Is Different
Next comes Werregarenstraat, which the city designates as a place for street artists. The reason is practical: the city wants to prevent graffiti from being sprayed on the city’s monumental buildings.
This stop is a good “modern Ghent” pause. Medieval cities can feel frozen in time, so it’s refreshing to see how Ghent handles preservation while still allowing creativity.
It’s also short (about 10 minutes), which keeps the tour moving and helps you reach the big finale without fatigue.
Stop 9: Ghent Town Hall (Stadhuis), the Building That Looks Confused
Then you see Ghent Town Hall, and your guide explains why the building looks a little bit confused—then ties it to the city’s most significant conflict.
That’s a clever way to teach architecture. Instead of asking you to memorize facts about style, the guide uses the building’s appearance as a clue to the political story behind it.
If you like your history connected to visible clues, this is a strong stop. If you prefer “tell me the story, then move on,” you’ll still get something useful.
Stop 10: St. Bavo’s Cathedral and the Van Eyck Anchor
St. Bavo’s Cathedral is next, and it’s where you hit the art-world headline. Your guide shares the cathedral’s long story and its most notable art treasure: the Ghent Altarpiece by the brothers Van Eyck.
Even if you don’t go inside on this walk, you’ll understand why people care so much. Ghent isn’t only a trade city. It became an art center, too, and the cathedral is one of the anchor places for that reputation.
The stop is short (around 10 minutes), so focus on the “why it matters” explanation and let the building’s scale do the rest.
Stop 11: The Belfort (Belfry) and the People’s Tower Story
Now you’re getting close to the finish. Het Belfort van Gent is described as the people’s tower—built to reflect stubbornness, power, and independence. Your guide also explains that the façade tells a story connected to its time as a prison, plus a bizarre local legend.
This is one of those stops where you can feel the city’s identity. The Belfry is not just a landmark; it’s a symbol of civic pride and control.
The tour ends in front of the Belfort, so treat this as the last chapter you’ll want to remember when you’re planning the rest of your day.
Stop 12: Esglesia de Sant Nicolau (Early 12th Century) and the Merchant’s Patron
The tour ends with Esglesia de Sant Nicolau, described as an early 12th-century gem. It overlooks Korenmarkt, and the patron saint is St Nicholas, protector of merchants and sailors.
Your guide uses the façade to explain the legend tied to the patron saint—so the tour circles back to trade, just with a spiritual layer.
It’s a fitting finale. By this point you’ve already covered the port zone, the city’s economic engine, and the civic symbols. Ending with a patron saint of merchants makes the whole narrative feel complete.
What Makes the Tour Feel Worth It: Guide Style and Small Luxuries
A walking tour lives or dies by the guide. The strongest themes from guides like Kenny, Camila, Hans, Arn, Julien, Sonia, Kasia, Maria, and Sebastian show up in how the tour feels: story-driven, relaxed, and built for questions.
A private format changes the vibe. You can ask why something matters right when you’re standing in front of it. You don’t have to wait for the next group to catch up.
I also appreciate that multiple guides have handled pacing for different walking speeds and adapted when weather or comfort needed it. That matters because it keeps the experience from turning into a “race to the next corner.”
Who Should Book This Private Ghent Highlights Tour
This tour is a great fit if:
- You want a fast, focused way to learn the city’s key landmarks and stories.
- You prefer a private setting where you can ask questions freely.
- You’re short on time but hate vague sightseeing. You want reasons, not just locations.
- You’re traveling with someone who enjoys history plus a few legend stories and personality.
It’s less ideal if:
- You’re only interested in inside museum visits and churches. This route is built around seeing and explaining more than ticketed interiors at each stop.
- You expect a flexible, stop-by-stop customization session beyond the standard route. The tour is designed to fit the two-hour window.
Final Decision: Book It or Skip It?
If you’re doing Ghent for the first time and want your bearings quickly, I’d book this. You get the city’s big themes—trade, civic power, belief, and legend—in a tight loop that ends at the Belfry, where Ghent’s independence story lands.
Just go in with the right expectation. Plan for mostly exterior views, and if you want interior access, budget for additional tickets or a pass. If you can handle that, this tour can be one of the smartest “first day in Ghent” choices.
FAQ
How long is the private historical tour of Ghent?
It runs for about 2 hours (approx.).
Where does the tour start and end?
It starts at Hostel Uppelink, Sint-Michielsplein 21, 9000 Gent, and ends in front of the Belfry of Ghent (Het Belfort van Gent) at Sint-Baafsplein.
Is this tour private or shared?
It’s a private tour, restricted to your group only.
What language is the tour offered in?
The tour is offered in multiple languages, including English.
What’s included in the price?
The price includes local/professional guide, hotel pick up and drop off, private tour, and all fees and taxes. You also get a mobile ticket.
Are entrance tickets included for the stops?
The stops are listed with admission ticket free in the tour details, so you generally won’t need to buy tickets just to see the sights on the route.
Is food included?
Food and drinks are not included, unless specified.
Can I bring a service animal, and is the area reachable by transit?
Service animals are allowed, and the meeting area is near public transportation. The tour states that most travelers can participate.
Is free cancellation available?
Yes. You can cancel up to 24 hours in advance for a full refund.